11th Mar 2024
Building an Interactive 3D Configurator with React Native and Three.js

Introduction to React Native

React Native lets you build mobile apps for Android and iOS using JavaScript and React. It combines the strengths of native development with the power of React, a popular JavaScript library for building user interfaces.
React Native wraps native components with React, letting developers use JavaScript and React's UI paradigm to build native apps for Android and iOS. This empowers both new and existing mobile teams to develop faster.
Table of Contents
1. Setting Up a React Native Project with TypeScript
2. Installing Required NPM Packages for Three.js
3. Creating a 3D Room Using Three.js
4. Adding a Materials List and Integrating it with the Scene
5. Implementing Button Controls for Material Selection
Prerequisites
Before you begin, ensure you have the following prerequisites installed:
- NodeJS
- Android Studio
1.Create a new React Native Project using typescript template using React Native CLI
Create a new React Native Project using following terminal
npx react-native init ThreeJS_Furniture_Configurator --template react-native-template-typescript
2.Installing required NPM packages for three js
Install the required npm packages in your project using the below commands
  npm i @react-three/fiber expo expo-gl r3f-native-orbitcontrols three
  @react-three/drei react-native-vector-icons react-native-simple-toast
@react-three/fiber is a library that enables you to use Three.js declaratively in React applications. It's commonly used with React projects, whether built with Expo or React Native CLI. However, when using @react-three/fiber with React Native, there are a few additional steps because React Native doesn't have built-in support for WebGL.
r3f-native-orbitcontrols is a package that provides orbit controls for React Native projects using @react-three/fiber. Orbit controls allow the user to rotate, pan, and zoom a 3D scene, similar to how a user would interact with a 3D scene in a web environment.
Expo provides a set of APIs and components for building React Native apps. One of these APIs is expo-gl, which enables OpenGL ES 2.0 support in Expo apps. Since Three.js relies on WebGL, you need to ensure that WebGL is available in your React Native app, and expo-gl helps provide this functionality in Expo-managed projects.
Install the expo modules in your project
npx install-expo-modules@latest
In a React Native CLI project (a project not managed by Expo), it's not necessary to install Expo modules if you're not planning to utilize Expo-specific functionalities. However, there might be situations where you want to use specific Expo modules even in a non-Expo project.
Expo's expo-gl module provides support for WebGL, which is essential for rendering 3D graphics with @react-three/fiber. Using Expo ensures that the necessary dependencies for WebGL rendering are properly configured and managed.
3.Create a 3D room using three js
To create a 3D room using Three.js in React Native, we'll start by importing the necessary components and libraries.
In your App.tsx, import the required components from @react-three/fiber and r3f-native-orbitcontrols
The Canvas component serves as the entry point for creating WebGL-rendered 3D scenes in React applications.Can set the camera position which comes as a props.
  import { Canvas,useThree } from "@react-three/fiber/native";
  import useControls from 'r3f-native-orbitcontrols';
const [OrbitControls, events] = useControls();
  return(
    <SafeAreaView style={{flex:1}}>
    {/* Here comes materials list */}
    <View
      style={{ backgroundColor: "#aab5c0", flex: 1 }} {...events}>
      <Canvas
        style={{ flex: 1 }}
        camera={{ position: [0, 30, 50] }}>
        <Suspense fallback={null}>
          {canvasMemo}
        </Suspense>
      </Canvas>
    </View>
    {/* Here comes buttons list */}

    </SafeAreaView>
  )
r3f-native-orbitcontrols provides a way to use orbit controls similar to those in a web environment. However, it does not include functionality for creating GUI controls. you can pass events as props to the View component to handle various user interactions such as zooming, rotating etc.
Create a Canvas Component in App.js using useMemo
  const canvasMemo = useMemo(() => {
    return (
      <CanvasItem />
    )
  }, []);
  const CanvasItem = () => {
    return (
      <scene>
        <OrbitControls enableRotate={true} enableZoom={true} enablePan={true} />
        <gridHelper position={[0, 1, 0]} args={[100, 20]} />
        <ambientLight args={['#ffffff', 0.20]} />
        <directionalLight castShadow={true} position={[-30, 50, -30]} />
        <mesh position={[0, 0, 0]}>
          <boxGeometry args={[100, 2, 100]} />
          <meshPhongMaterial color={'#bfd1e5'} />
        </mesh>
        {/* Left */}
        <mesh rotation={[0, 0, Math.PI / 2]} userData={{ ground: true }} position={[-50, 50, 0]} castShadow={true} receiveShadow={true}>
          <boxGeometry args={[100, 2, 100]} />
          <meshPhongMaterial color={'lightgray'} />
        </mesh>
        {/* Right */}
        <mesh rotation={[0, 0, -Math.PI / 2]} userData={{ ground: true }} position={[50, 50, 0]} castShadow={true} receiveShadow={true}>
          <boxGeometry args={[100, 2, 100]} />
          <meshPhongMaterial color={'#bfd1e5'} />
        </mesh>
        {/* Top */}
        <mesh rotation={[0, -Math.PI / 2, 0]} userData={{ ground: true }} position={[0, 100, 0]} castShadow={true} receiveShadow={true}>
          <boxGeometry args={[100, 2, 100]} />
          <meshPhongMaterial color={'lightgray'} />
        </mesh>
        {/* Back */}
        <mesh rotation={[0, -Math.PI / 2, -Math.PI / 2]} userData={{ ground: true }} position={[0, 50, -50]} castShadow={true} receiveShadow={true}>
          <boxGeometry args={[100, 2, 100]} />
          <meshPhongMaterial color={'#bfd1e5'} />
        </mesh>
      </scene>
    )
  }
Explanation
- Scene: Scene is a container that holds all the objects, lights, cameras, and other elements that you want to render.
- OrbitControls: OrbitControls is a utility provided by Three.js that enables easy manipulation of the camera in a 3D scene, allowing the user to orbit around a target point, zoom in and out, and pan the camera.
- Grid Helper: GridHelper is a helper object used to create a grid in 3D space. It's often used for visualizing the orientation and scale of a scene.we can set the position with XYZ axis and use the two args with size and divisions
- Ambient light and directional light : lights are used to illuminate objects in a scene, creating realistic shading and shadows. Two commonly used types of lights are ambient light and directional light.Lights contains the two args with the light color and intensity of the light.
- Mesh : Mesh is a fundamental object used to represent 3D geometry in a scene. It's composed of three main components: geometry, material, and transformation (position, rotation, scale). Can set the position with XYZ axis and contains the children with geometry and material with required args and color of the material.First mesh is considered as the ground.Following the ground mesh , we added the same for right,left ,top and bottom controlled through rotation.
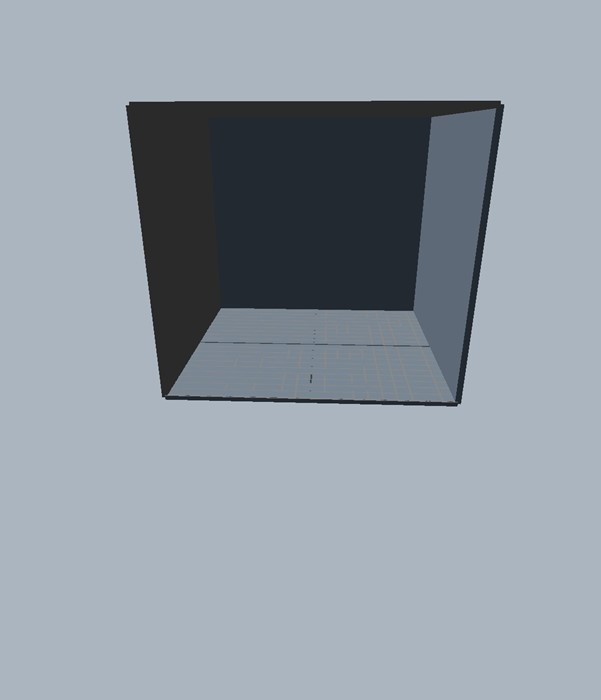
Output after creating the room
4. Adding a Materials List and Integrating it with the Scene
Create a defaultlist.tsx to hardcode the default material list
  export const materialList = [
    {
        materialName: "Chair_1",
        materialFile: AssetImages.arm_chair_furniture,
        image: AssetImages.arm_chair_furniture_image,
        component: <Chair1 />,
        defaultRotation: [0, 0, 0],
        defaultScale: 0.1,
        ref: createRef(),
        defaultPosition:[0, 0, 20]
    },
    {
        materialName: "Chair_2",
        materialFile: AssetImages.modern_chair,
        image: AssetImages.modern_chair_image,
        component: <Chair2 />,
        defaultRotation: [0, 0, 0],
        defaultScale: 15,
        ref: createRef(),
        defaultPosition: [15, 0, 0]
    },
    {
        materialName: "Chair_3",
        materialFile: AssetImages.generic_modern_chair,
        image: AssetImages.generic_modern_chair_image,
        component: <Chair3 />,
        defaultRotation: [-Math.PI / 2, 0, 0],
        defaultScale: 2,
        ref: createRef(),
        defaultPosition: [30, 0, 0]
    },
    {
        materialName: "Table",
        materialFile: AssetImages.wooden_table,
        image: AssetImages.woodentable_image,
        component: <Table />,
        defaultRotation: [-Math.PI / 2, 0, 0],
        defaultScale: 0.3,
        ref: createRef(),
        defaultPosition: [-15, 5, 0]
    }
]
    const modern_chair = require('../../assets/modern_chair.glb');
    const arm_chair_furniture = require('../../assets/arm_chair_furniture.glb');
    const wooden_table = require('../../assets/wooden_table.glb');
    const generic_modern_chair = require('../../assets/generic_modern_chair.glb');

    //Image
    const woodentable_image = require('../../assets/image/woodentable_image.jpg');
    const generic_modern_chair_image = require('../../assets/image/generic_modern_chair_image.jpg');
    const modern_chair_image = require('../../assets/image/modern_chair_image.jpg');
    const arm_chair_furniture_image = require('../../assets/image/arm_chair_furniture_image.jpg');
    const vs_logo = require('../../assets/image/vs_logo.png');


    const AssetImages = {
        modern_chair, arm_chair_furniture, wooden_table, generic_modern_chair,woodentable_image,
        generic_modern_chair_image,modern_chair_image,arm_chair_furniture_image,vs_logo
    }

    export default AssetImages;
Explanation
- Material List: Adding the default material list with material name ,material file ,image,component ,ref with default scale ,rotation and position. you can load GLB (Binary glTF) models to use as 3D objects in your scene. GLB files contain both the geometry and materials of 3D models, making them self-contained and easy to use.We use GLTFLoader to load the GLB model file.Component will come from the file which loads from useGLTF from @react-three/drei.Check the below image for example.Can get the custom GLB models here https://sketchfab.com/feed.
- AssetImages : Maintaining the material images and GLB objects ina single file called assetimages.tsx which is imported in material list.
Example component for GLB object loading
    import { useGLTF } from '@react-three/drei';
    import React from 'react'
    import AssetImages from '../../common/assetimages';

    const Chair1 = () => {
        const { nodes, materials }: any = useGLTF(AssetImages.arm_chair_furniture);
        return (
            <>
                <mesh
                    userData={{ name: 'CHAIR1', draggable: true }}
                    castShadow
                    receiveShadow
                    geometry={nodes.Object_6.geometry}
                    material={materials.Base}
                    position={[0, 50, 0]}
                    scale={43.314}
                />
            </>
        )
    }

    export default Chair1;
ReConfigure metro.config.js to load the glb models:
    const defaultConfig = getDefaultConfig(__dirname);
    const { assetExts, sourceExts } = defaultConfig.resolver;
    const config = {
      transformer: {
        babelTransformerPath: require.resolve('react-native-react-bridge/lib/plugin'),
      },
      resolver: {
        assetExts: [
          ...assetExts.filter(ext => ext !== 'svg'),
          'glb',
          'gltf',
          'png',
          'jpg',
          'obj'
        ],
        sourceExts: [...sourceExts, 'svg', 'js', 'jsx', 'json', 'ts', 'tsx', 'cjs'],
      },
    };

    module.exports = mergeConfig(getDefaultConfig(__dirname), config);
Adding material list to App.tsx return statement
    <View
    style={{ backgroundColor: "#94a3b8" }}>
    <ScrollView style={{ padding: 10 }} horizontal showsHorizontalScrollIndicator={false}>
      {
        materialList.map((item, index): any => {
          return <View key={index} style={{ marginHorizontal: 10 }}>
            <TouchableOpacity style={{
              borderWidth: 2,
              borderColor: item.materialName == selectedItem.materialName ? 'green' : "transparent",
              borderRadius: 6
            }}
              onPress={e => {
                onAddItem(item);
              }} activeOpacity={0.5}>
              <Image source={item.image} style={{ height: 50, width: 50 }} />
            </TouchableOpacity>
            <TouchableOpacity onPress={e => {
              onRemoveItem(item);
            }} className='items-center'>
              <AntDesign name={'closecircle'} color={'red'} size={20} />
            </TouchableOpacity>
          </View>
        })
      }
    </ScrollView>
  </View>
Explanation
- Mapping material list inside the scrollview to scroll horizontally and selecting the material to add the material to the scene.
- Add the required function for adding and removing.
- Font icons used from react-native-vector-icons npm package.
- Check the below images for functions and state variables and created toast message component which from npm package react-native-simple-toast.
- Addedlist usestate is used to store the data while clicking the material to add and remove. SelectedItem will store the current selected item.
    const [addedList, setAddedList] = useState<any>([]);
    const [selectedItem, setSelectedItem] = useState<any>({});
    const canvasMemo = useMemo(() => {
      return (
        <CanvasItem />
      )
    }, [addedList]);

    const onAddItem = (item: any) => {
      for (let i = 0; i < addedList.length; i++) {
        if (addedList[i].materialName == item.materialName) {
          setSelectedItem(item);
          return;
        }
      }
      if (selectedItem && selectedItem.materialName == item.materialName) {
        errorToast("Already added in the scene");
      }
      else {
        setAddedList([...addedList, item]);
        setSelectedItem(item);
      }
    }

    const onRemoveItem = (item: any) => {
      if (addedList && addedList.length > 0) {
        for (let i = 0; i < addedList.length; i++) {
          if (item.materialName == addedList[i].materialName) {
            setAddedList(addedList.filter((i: any) => i.materialName != item.materialName));
            console.log(selectedItem);
            if (item.materialName == selectedItem.materialName && selectedItem) {
              setSelectedItem({});
            }
            successToast("Removed successfully");
          }
        }
      }
      else {
        errorToast("Items not available in the scene");
      }
    }
    import Toast from 'react-native-simple-toast';

    export const errorToast = (message: string, duration: number = 2000) => {
        Toast.show(message ? message : "", duration);
    }

    export const successToast = (message: string, duration: number = 2000) => {
        Toast.show(message ? message : "", duration);
    }
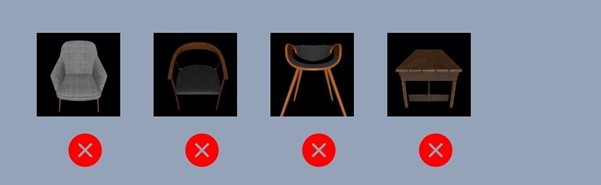
Output after adding material list for selection
5. Implementing Button Controls for Material Selection
    <View>
      <ScrollView horizontal showsHorizontalScrollIndicator={false}
        style={{padding:10,backgroundColor:"#94a3b8"}}>
        <View style={{ flexDirection: "row", gap: 10 }}>
          <Button title='X+' onPress={e => {
            moveXZObject("x", "+");
          }} />
          <Button title='X-' onPress={e => {
            moveXZObject("x", "-");
          }} />
          <Button title='Z+' onPress={e => {
            moveXZObject("z", "+");
          }} />
          <Button onPress={e => {
            moveXZObject("z", "-");
          }} title='Z-' />
          <Button title='RY+' onPress={e => {
            moveRotateObject("+")
          }} />
          <Button title='RY-' onPress={e => {
            moveRotateObject("-")
          }} />
        </View>
      </ScrollView>
    </View>
Explanation
- Add the button controls like X+,X-,Z+,Z-,RY+ and RY- to move the material according to the respective axis.
- Write two functions named as moveXZObject and moveRotateObject to move materials.
- Check the functions in the below image.
    const moveXZObject = (direction: any, type: any) => {
      if (!selectedItem.materialName) {
        errorToast("Objects not available in the scene");
        return;
      }
      for (let i = 0; i < addedList.length; i++) {
        if (addedList[i].materialName == selectedItem.materialName) {
          let val = addedList[i].ref.current.position[direction];
          if (type == "+")
            val += 1;
          else if (type == "-")
            val -= 1;
          addedList[i].ref.current.position[direction] = val;
          if (direction == "x")
            addedList[i].defaultPosition[0] = val;
          else if (direction == "z")
            addedList[i].defaultPosition[2] = val;
        }
      }
    }

    const moveRotateObject = (type: any) => {
      if (!selectedItem.materialName) {
        errorToast("Objects not available in the scene");
        return;
      }
      for (let i = 0; i < addedList.length; i++) {
        if (addedList[i].materialName == selectedItem.materialName) {
          let val = addedList[i].ref.current.rotation[addedList[i].materialName == "Table" || addedList[i].materialName == "Chair_3" ? "z" : "y"];
          if (type == "+")
            val += 0.1;
          else if (type == "-")
            val -= 0.1;
          addedList[i].ref.current.rotation[addedList[i].materialName == "Table" || addedList[i].materialName == "Chair_3" ? "z" : "y"] = val;
          addedList[i].defaultRotation[addedList[i].materialName == "Table" || addedList[i].materialName == "Chair_3" ? 2 : 1] = val;
        }
      }
    }
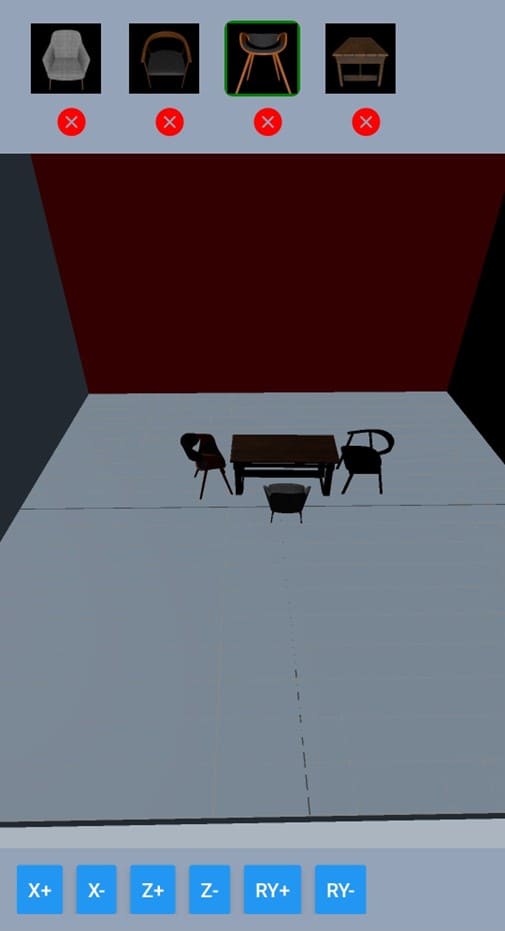
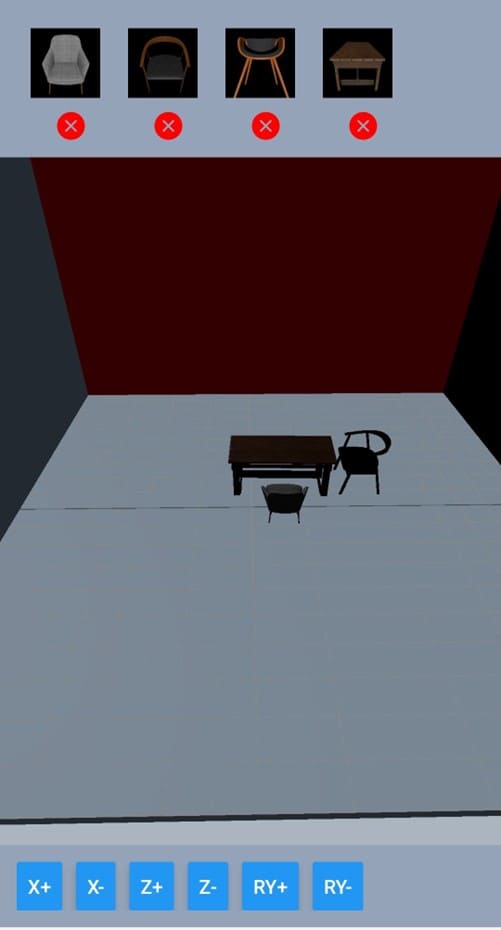
Final Output after adding and removing material
Conclusion
Here's a summarized conclusion for the provided steps:
1. Create React Native Project using TypeScript Template:
Create a new React Native project using the TypeScript template to ensure type safety and better development experience.
2. Installing Required NPM Packages for Three.js:
Install necessary NPM packages for using Three.js in your React Native project. This typically involves installing @react-three/fiber, three, and any other additional dependencies.
3. Create a Room Using Three.js:
Using Three.js to create a 3D room within your React Native project. It will define the room's geometry, materials, lighting, and any additional elements needed to construct the scene.
4. Add Materials List and Add to the Scene:
Implement a materials list within your project to manage different materials that can be applied to objects within the 3D room. Add these materials to the scene as needed, to customize and dynamic rendering.
5. Button Controls to Move the Selected Material:
Integrate button controls into your React Native application to enable users to interact with the 3D scene. Implement functionality that allows users to select materials from the list and apply them to objects within the room, providing a seamless and intuitive user experience.
By following these steps, you can successfully create a React Native application with a 3D room using Three.js, implement a materials list, and button controls for material selection and application, enhancing the interactivity and visual appeal of your application.