3rd Mar 2023
How to Containerize a GUI Application with Docker

In this tutorial let’s see how to containerize a graphical user interface (GUI) application using docker. Here we are going to use an electron app as our GUI application.
In order to run GUI applications in docker, you will need to enable access to the host system’s display and input devices from the container which is why we need to install Windows X Server
Note: If you are not familiar with docker check out this other tutorial on “Fundamentals of Docker”
Install VcXsrv and configure it
The easiest way to install VcXsrv Windows X Server is Choclatey(https://chocolatey.org/)
After installing it type in the following command in the powershell
choco install vcxsrv
Then run Xlaunch from the start menu and follow the initial configuration steps:
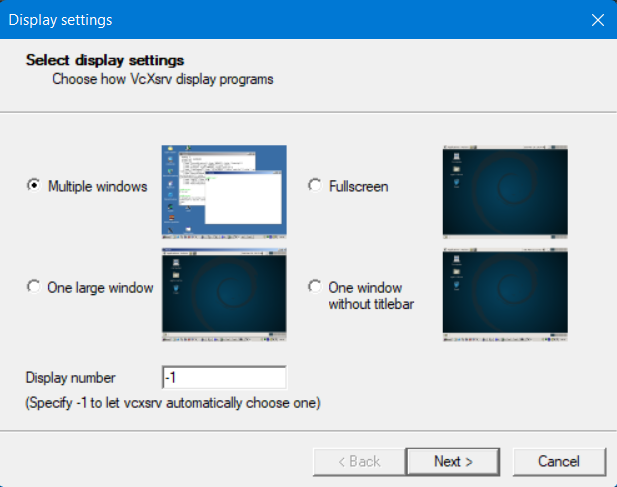
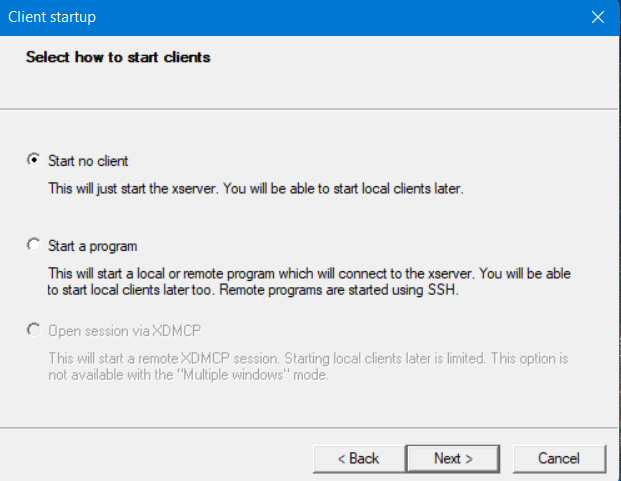
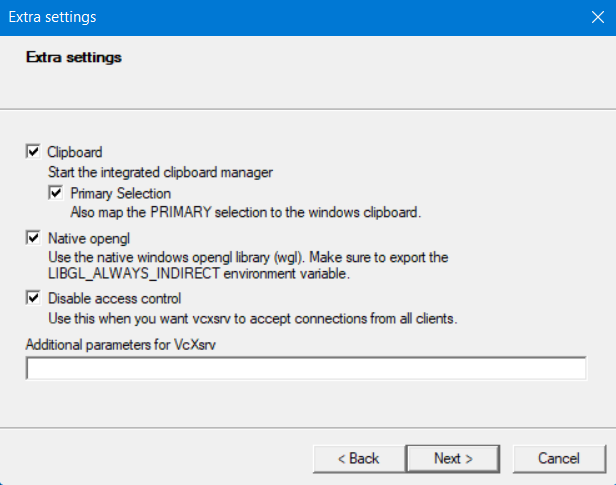
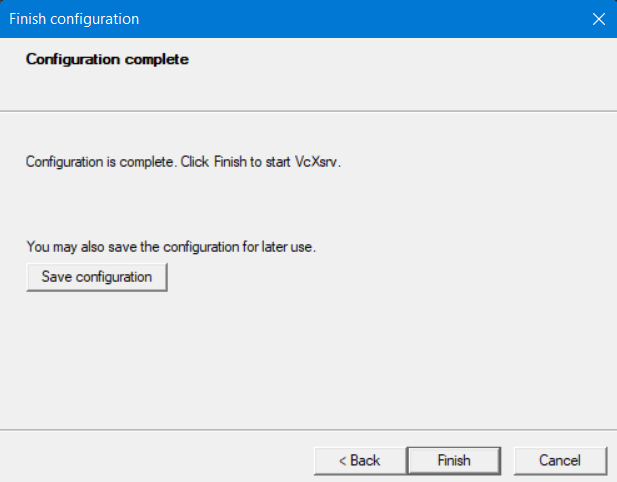
Be sure to save the configuration before you click finish.
Example Project
Create the following files and folder with the directory structure as follows,
Directory Structure
* package.json
* Dockerfile
* src
* main.js
* index.html
And copy paste the below code in the relevant files
package.json,
  {
    "name": "electron-in-docker",
    "version": "1.0.0",
    "description": "",
    "main": "src/main.js",
    "scripts": {
      "start": "electron . --no-sandbox"
    },
    "author": "",
    "license": "ISC",
    "devDependencies": {
      "electron": "^13.1.7",
      "electron-rebuild": "^2.3.5"
    }
  }
index.html,
<!DOCTYPE html>
<html>
  <head>
    <meta charset="UTF-8">
    <meta http-equiv="Content-Security-Policy" content="default-src 'self'; script-src 'self'">
    <meta http-equiv="X-Content-Security-Policy" content="default-src 'self'; script-src 'self'">
    <title>Hello World!<title>
  <head>
  <body>
    <h1>Hello World!<h1>
  </body>
</html>
main.js,
  const { app, BrowserWindow} = require("electron");
  function createWindow() {
    const win = new BrowserWindow({
      width: 800,
      height: 600,
    });

    win.loadFile("src/index.html");
  }

  app.whenReady().then(() => {
    createWindow();
  });
Finally The docker file,
  # use the version that corresponds to your electron version
  FROM node:19.2
  # RUN echo 'root:123456' | chpasswd
  # install electron dependencies or more if your library has other dependencies
  RUN apt-get update && apt-get install       libx11-xcb1 libxcb-dri3-0 libxtst6 libnss3 libatk-bridge2.0-0 libgtk-3-0 libxss1 libasound2 libdrm2 libgbm1 libglvnd-dev dbus nano xauth       -yq --no-install-suggests --no-install-recommends       && apt-get clean && rm -rf /var/lib/apt/lists/*

  # copy the source into /app
  WORKDIR /app
  COPY . .
  RUN chown -R node /app

  # # install node modules and perform an electron rebuild
  USER node
  RUN npm install
  # RUN npx electron-rebuild

  # Electron needs root for sand boxing
  # see https://github.com/electron/electron/issues/17972
  USER root
  RUN chown root /app/node_modules/electron/dist/chrome-sandbox
  RUN chmod 4755 /app/node_modules/electron/dist/chrome-sandbox

  # Electron doesn't like to run as root
  USER node
  # CMD ["npm", "run", "dev"]
  CMD bash
Let’s see what some of the above docker commands does,
FROM node:19.2: This line specifies the base image for the Docker image being built. In this case, it's the node:19.2 image.
RUN apt-get update && apt-get install \
libx11-xcb1 libxcb-dri3-0 libxtst6….
This line updates the package repository and install several dependencies required to run Electron applications
WORKDIR /app
COPY . .
RUN chown -R node /app
These lines set the working directory to /app, copy the contents of the current directory into the Docker image's /app directory
- RUN chown -R node /app: This command changes the ownership of the /app directory and all of its contents to the node user. This is useful because the subsequent npm install command needs to write files to the /app directory.
- USER node: This command switches the user to node. All subsequent commands will be executed as the node user.
- RUN npm install: This command install the Node.js dependencies for the application.
- USER root: This command switches the user back to root.
- RUN chmod 4755 /app/node_modules/electron/dist/chrome-sandbox: This command sets the setuid bit on the chrome-sandbox binary in the Electron module. This is required for Electron to run properly inside a Docker container.
- USER node: This command switches the user back to node
- CMD bash: This command specifies that when the container is run, it should execute the bash shell as the default command.
Now, we can build the docker image, using the command,
build -t elec-docker-demo
Build and Run the Image
Now, we can run the image with the command,
docker run -it -e DISPLAY=host.docker.internal:0 --net=host --name elec-docker-demo 2e5da25aa7f2
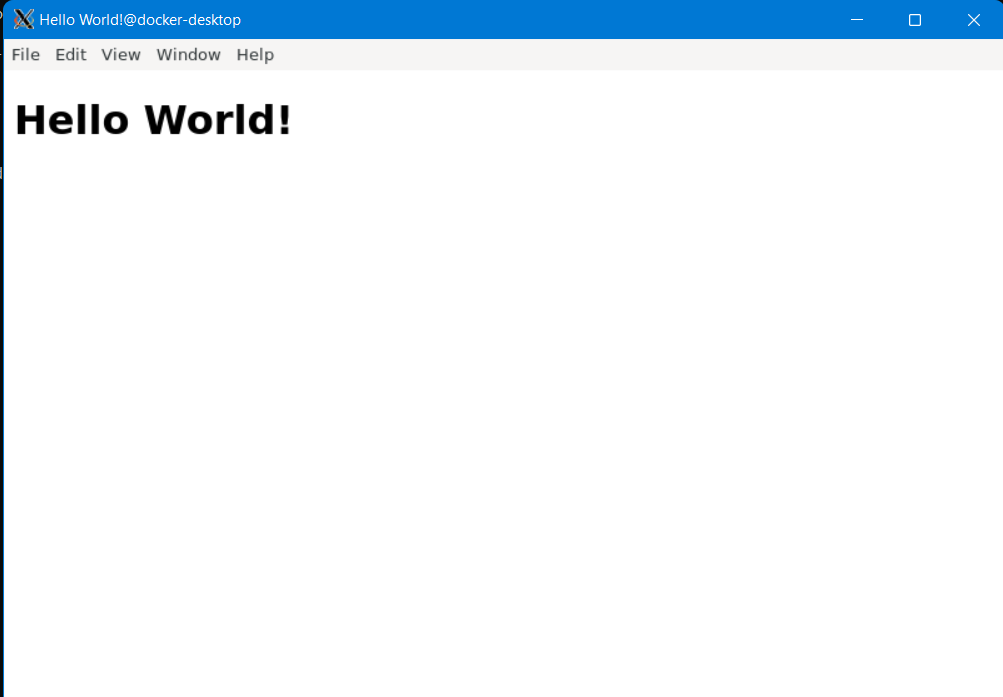
Now the container terminal gets opened, in it type the command “npm start” you should see a window open in Windows X Server as follows,
Conclusion
Thus, we have successfully containerised a GUI application using docker and Windows X Server.
About Us
- VS Online Services : Custom Software Development
VS Online Services has been providing custom software development for clients across the globe for many years - especially custom ERP, custom CRM, Innovative Real Estate Solution, Trading Solution, Integration Projects, Business Analytics and our own hyperlocal e-commerce platform vBuy.in and vsEcom.
We have worked with multiple customers to offer customized solutions for both technical and no technical companies. We work closely with the stake holders and provide the best possible result with 100% successful completion To learn more about VS Online Services Custom Software Development Solutions or our product vsEcom please visit our SaaS page, Web App Page, Mobile App Page to know about the solution provided. Have an idea or requirement for digital transformation? please write to us at siva@vsonlineservices.com