18th Jan 2022
Integrating MySQL with Node.js Applications
Node.js was developed as an asynchronous, event-driven JavaScript runtime for building scalable network applications. Javascript is far and wide in the paradigm of NodeJs which makes it a welcoming platform for software inventors.
MySQL is a Relational database macrm- app- operation system( RDBMS) and is also one of the most popular open- source databases in the world. utmost of the Popular programming languages like Java, PhP provides motorists to pierce and use it.
In this knot js and MySQL tutorial, we will learn how to connect Node js garçon with MySql database and using parameterized queries to avoid SQL injection.
SQL injection is a system used by vicious bushwhacker to change the structure of a web operation's SQL statements to steal data, modify data, or grease command injection into the underlying operating system. You can prevent SQL injection by using parameterized queries. Instead of using constant values, parameterized SQL queries let you include parameters in your queries. Parameters only take a value when the query is executed.
Let us see How to Integerate Mysql and NodeJs
Prerequisite, you must have NodeJs and MySql Installed in your system
Create a New Directory
Create a new directory named 'NodeWithMySql' and navigate to that Directory using the following commands
  mkdir NodeWithMySql
  cd NodeWithMySql
After Creating the new Directory Use the Following Command to generate a new package.json file which will contain all the required meta data.
npm init

This is followed by installing the NodeJs MySQL driver package via npm package manager
npm install Mysql
Now to run the node application we need to install express framework which will help us to serve the application
npm install express
Then create a database in mySQL named nodewithmysql, and add the table named users

Now lets add Express layer to our Nodejs application
Open the folder in text-editor of your choice. Here I've used Visual Studio Code.
And create a file named index.js in the direcotry root.
In that file paste the following code which uses 'express' to serve the application in the port 4000
  const express = require('express');
  const app = express();
  const port = 4000;
  app.get('/get', (req, res) => {
  res.send("Hello world");
  });
  app.listen(port, () => {
      console.log('Server is running at port ${port}');
  });
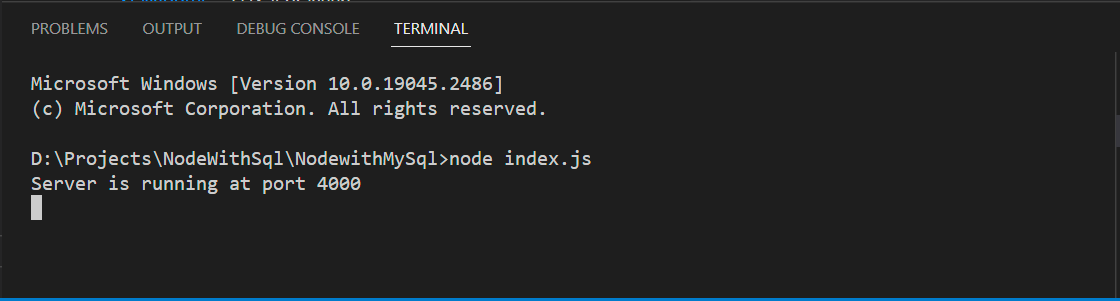
Now we will test our NodeJs application.
Use the following command in command prompt to run the application
node index.js
The following message should appear in your command prompt which indicates that the application is now served at port 4000
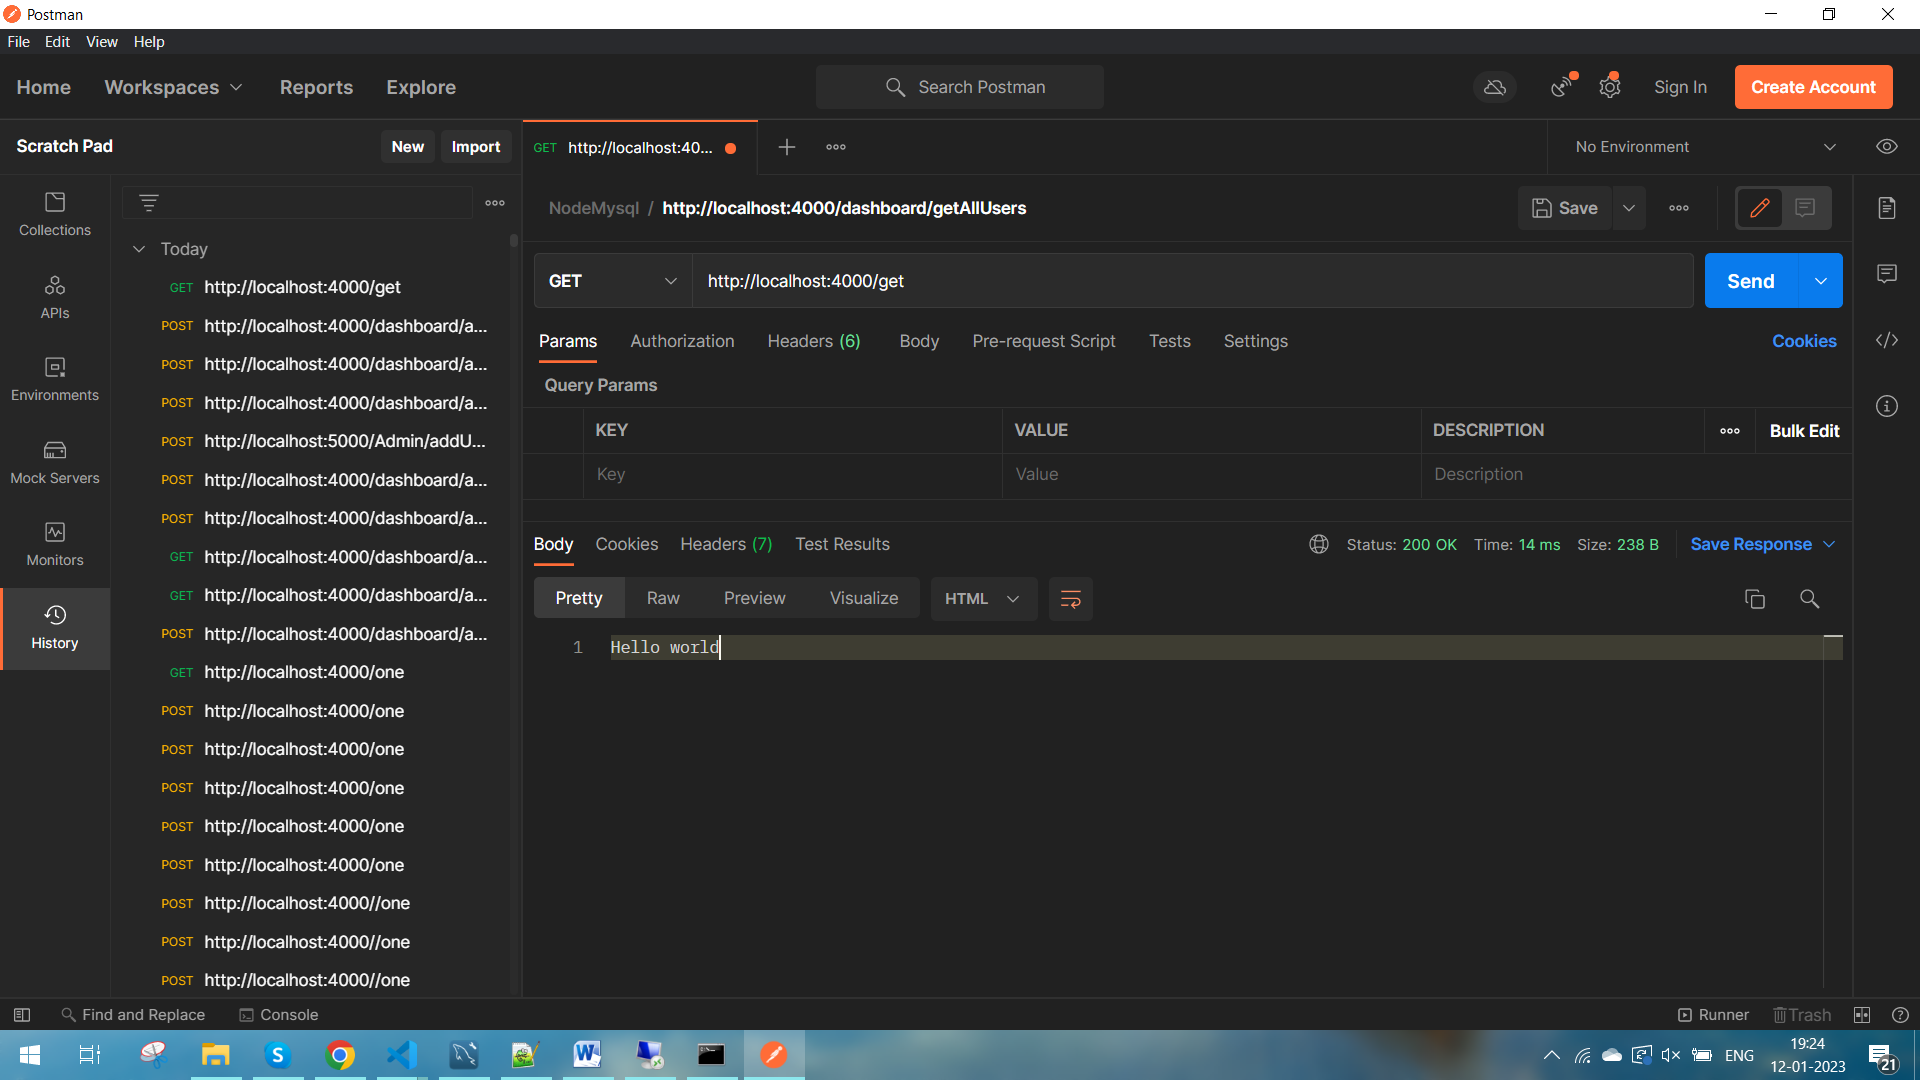
Here we will use Postman to Test our application. Let's hit the path '/get' which should return 'Hello world'
Connect mysql database with nodejs
It is better to structure our applicatoin using Service Oriented Architecture (SOA) which helps to organize files when the Because the application is large, more developers must work on it.
1. Controllers: (Our requests' entry and exit points)
2.Services - (Handles Business logics and is used to make calls to database)
3. Routes: This section handles requests and forwards them to our controller.
4.Dbqueries: (This is the location of all of our queries)
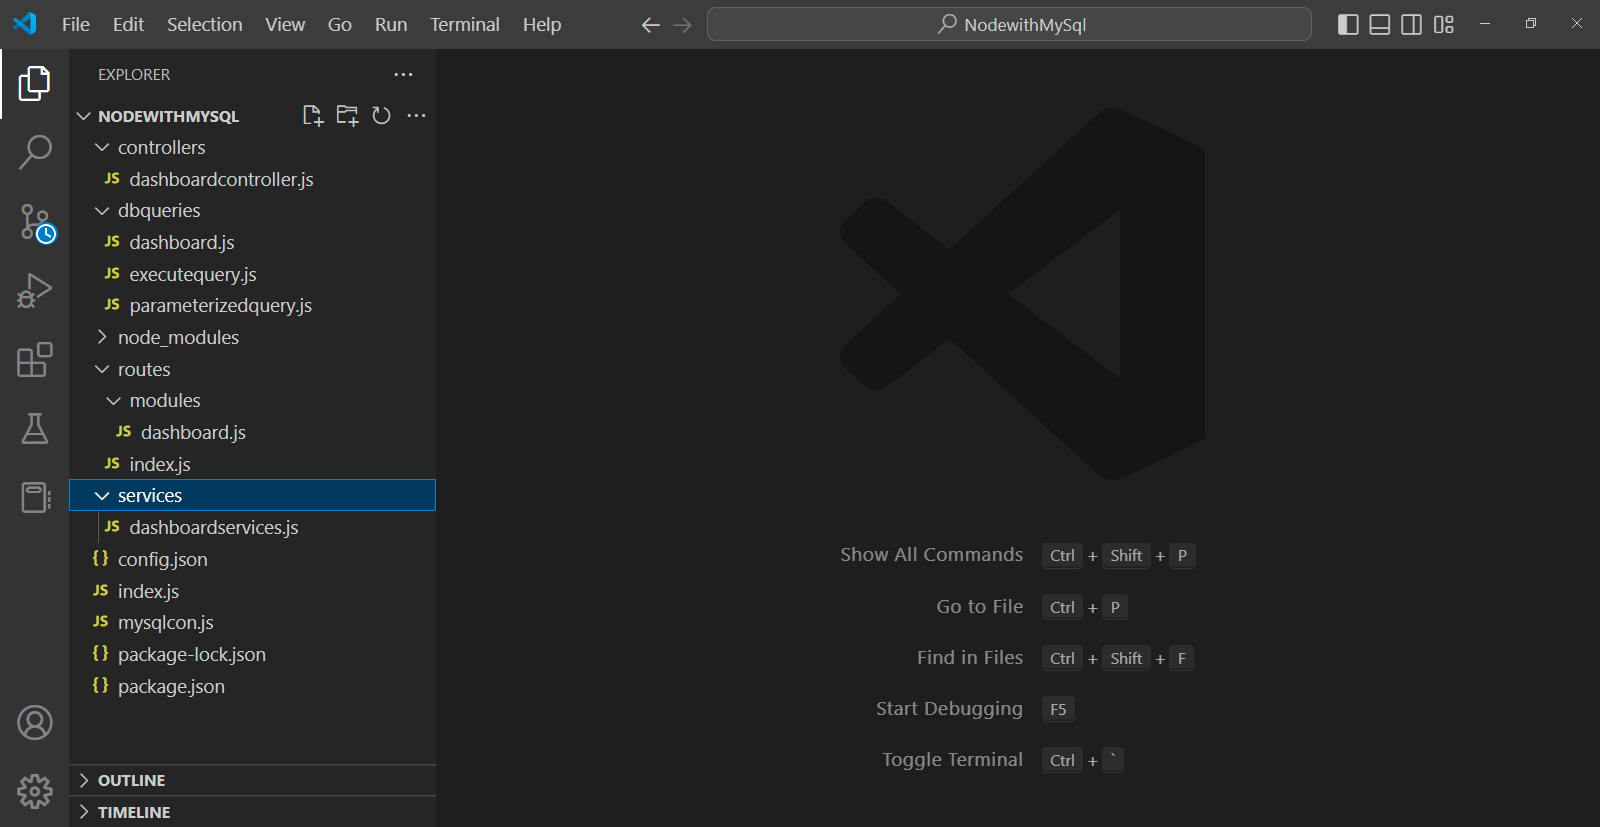
This is how the final structure of our project will look
Now we will add new file config.json in the root directory to store database credentials. It is always a better way to store the credentials in a separate file.
                                    {
    "mysqlserver": {
        "host": "localhost",
        "user": "yourUserName",
        "password": "yourPassword",
        "database": "tech"
    }
   }
Produce a new train mysqlcon.js in the root directory which will establish connection with database.
  const util = require('util');
  const mysql = require('mysql');
  const config = require("./config.json");
  var pool;
  try {
      const con = {
      host: config.mysqlserver.host,
      user: config.mysqlserver.user,
      password: config.mysqlserver.password,
      database: config.mysqlserver.database,
      connectionLimit: 10000
      };
      pool = mysql.createPool(con);
      pool.query = util.promisify(pool.query);
  }
  catch (err) {
      console.log('error');
  }
  module.exports = pool;
produce a brochure named routes and under routes brochure and add another brochure named modules under modules add a train named dashboard.js. Here we will route the http request to the individual methods based on the request. In this particular route we are routing the http request '/getUsersDetails' to the controller named dashboardcontroller and to the method getUsersDetails
  const express = require('express');
  const router = express.Router();
  const dashboardController = require('../../controllers/dashboardcontroller');
  var bodyParser = require('body-parser')
  var jsonParser = bodyParser.json();
  router.route('/getUsersDetails').get(dashboardController.getUsersDetails);
  module.exports = router;
In routes folder create a file named index.js and add the following code to route the request to dashboard controller.
    const express = require("express");
    const router = express.Router();
    const dashboardRouter = require('./modules/dashboard');
    router.use("/dashboard", dashboardRouter);
    module.exports = router;
Then add a folder named controller(which is the entry and exit point for all request) in the root directory and then add dashboardcontroller.js file and paste the following code. This is the one we required in our routes/modules/dashboard.js.
The method 'getUsersDetails' will be used to get the user details that we stored in our database
    const dashboardServices = require('../services/dashboardservices');
    const getUsersDetails = async (req, res, next) => {
        try {
            let result = await dashboardServices.getUsersDetails(req.query.Id);
            return res.status(200).json({
                Status: true,
                Message: result
            });
        }
        catch (err) {
            return res.status(500).json({
                Status: false,
                Message: "There is some error => "+ err
            });
        }
    }
    module.exports = {
        getUsersDetails
    }
Then add a folder named service(which is the business logic layer where calls to database is made) in the root directory and produce a train named dashboardService.js and bury the following law. Here we find the lines which get the query from a file and execute it another file, don't worry about it, paste the code, this is the part where the parameterized query comes into action.
    const executeQuery = require('../dbqueries/executequery');
    const dashboardQueries = require('../dbqueries/dashboardQuery');
    const getUsersDetails = async function (Id) {
        try {
            let query = dashboardQueries.getUsersDetails(Id);
            let userDetails = await executeQuery.executeQuery(query.query, query.values);
            return userDetails;
        }
        catch (err) {
            throw err;
        }
    }
    module.exports = {
        getUsersDetails
    };
Also add' dbqueries' brochure and produce the train named dashboardQuery.js train and add the following law. Then we're having the queries in a separate train for organizing our lines it. Here we find the line which requires the file 'parameterizedquery'. This is explained below.
    const parameterizedQuery = require('./parameterizedquery');
    const getUsersDetails = function (Id) {
        const sql = 'Select ID, FullName, Email from users where Id = ${Id}'
        let data = {
            Id: Id
        }
        return parameterizedQuery.createParameterizedQuery(sql, data);
    }
    module.exports = {
        getUsersDetails
    }
Traditionally we write queries in such a way where the parameters are directly written in the query string, these are the parameters that's passed from frontal- end. An attacker can alter the query by passing a valid SQL statement as parameters, since we directlty use the parameters from the front-end to construct the query string, there is a chance that extra details may be queried.
let query = 'Select ID, FullName, Email from users where Id = ' + request.getParameter("customerID");
Create the file named ParameterisedQuery.js in dbqueries folder and add the following code. Here is the section where we combat SQL injection. In the above service file we make a call to this file by passing the query along with its parameters. It returns our query with the parameter which we passed in such a way that can directly be executed by MySql.
  const createParameterizedQuery = function (query, data) {
  const rexParam = /(?<!$)${([^}]+)}/g;
  const values = [];
  const preppedSql = query.replace(rexParam, (_, paramName) => {
      const value = data[paramName];
      if (value === undefined) {
          throw new Error('Missing parameter '${paramName}'');
      }
      values.push(value);
      return "?";
  });
    return {
      query: preppedSql,
      values: values
    }
  }
  module.exports = {
   createParameterizedQuery
  }
Then Add a file named executeQuery.js in dbqueries folder and add the following code. This is where we pass the prepped SQL query to MySql to execute it.
    var Promise = require('bluebird');
    const pool = require('../mysqlcon');
    const executeQuery = async (query, values) => {
        return new Promise((resolve, reject) => {
            pool.query(query, values, async function (error, data) {
                if (error) {
                    return reject(error);
                }
                else {
                    resolve(data);
                }
            });
        });
    }
    module.exports = {
        executeQuery
    }
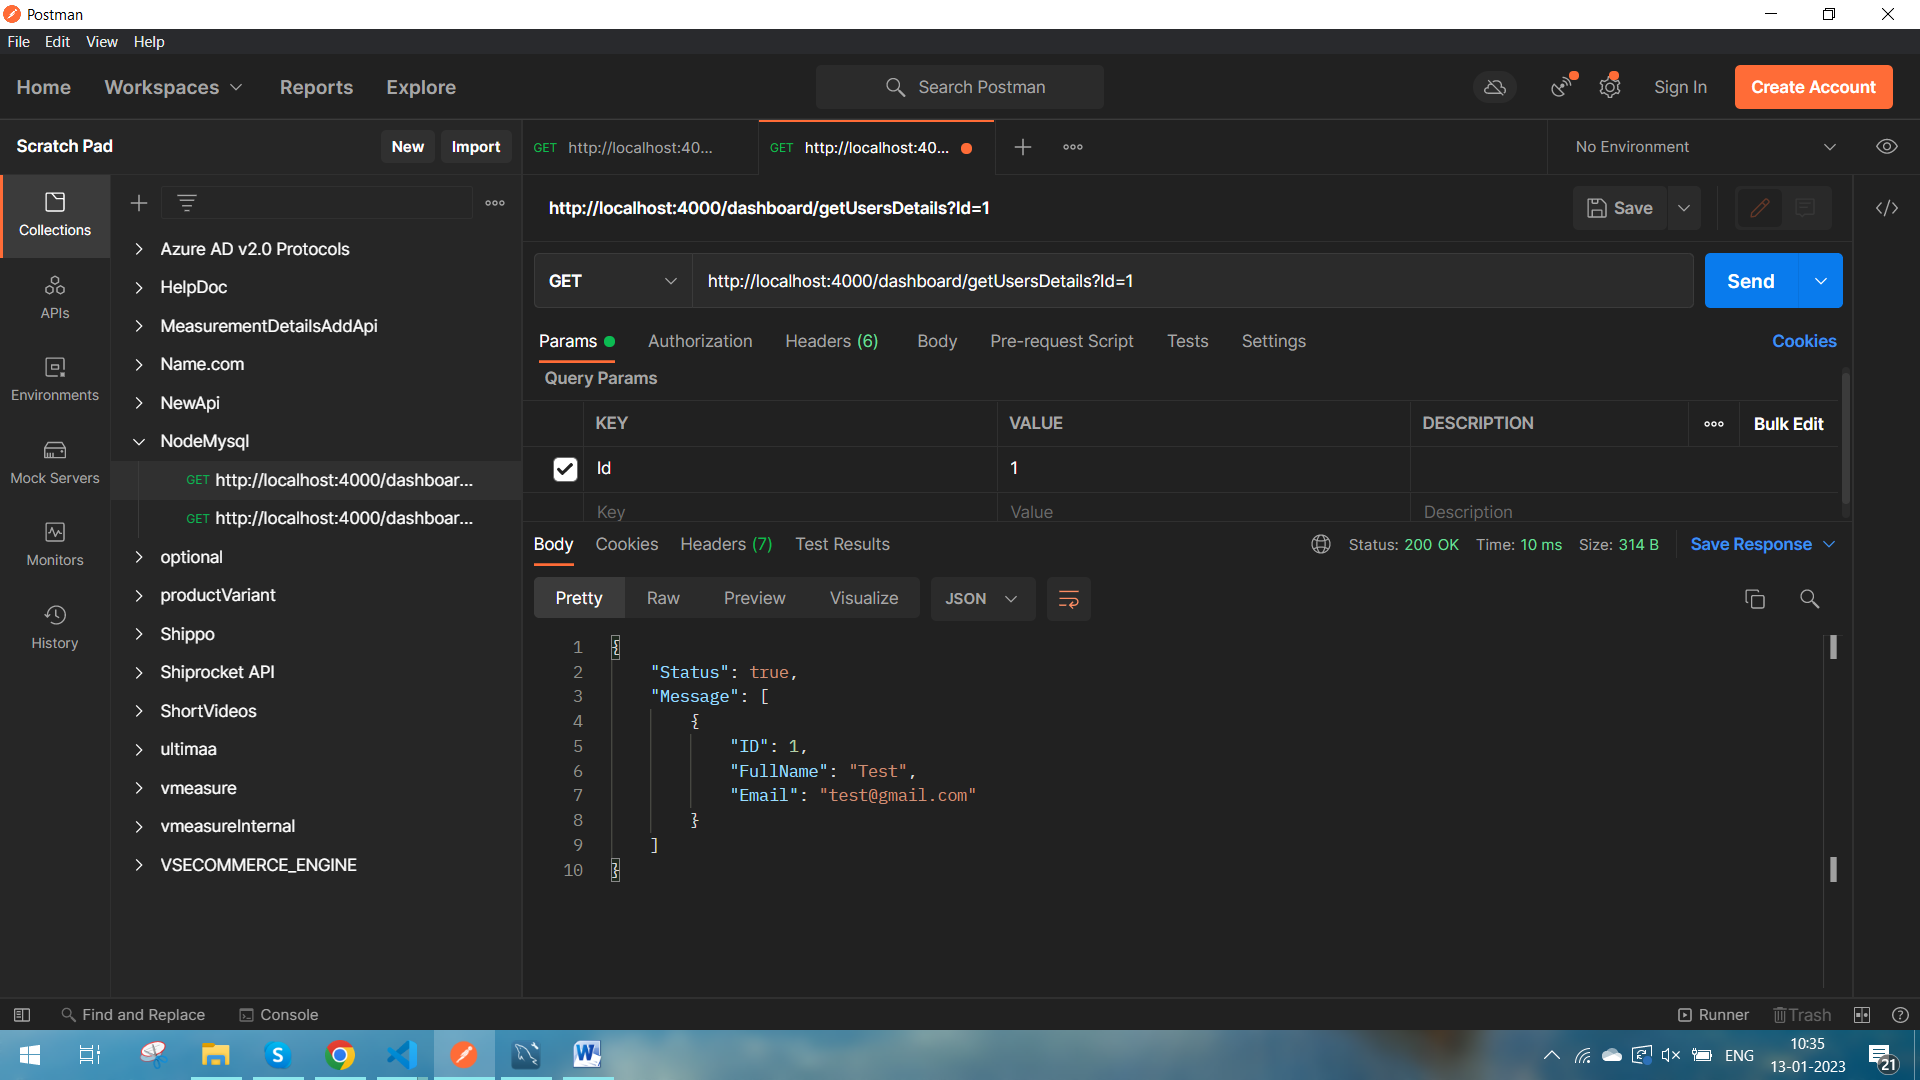
Finally Test the Application
Using Postman, we will test our application first. Hit the API
http://localhost:4000/dashboard/getUserDetails?Id=1
That's all folks, we have learned how to connect Nodejs server with MySql database and using parameterized queries to avoid SQL injection.
About Us
- VS Online Services : Custom Software Development
VS Online Services has been providing custom software development for clients across the globe for many years – especially custom ERP, custom CRM, Innovative Real Estate Solution, Trading Solution, Integration Projects, Business Analytics and our own hyperlocal e-commerce platform vBuy.in and vsEcom.
We have worked with multiple customers to offer customized solutions for both technical and no technical companies. We work closely with the stake holders and provide the best possible result with 100% successful completion To learn more about VS Online Services Custom Software Development Solutions or our product vsEcom please visit our SaaS page, Web App Page, Mobile App Page to know about the solution provided. Have an idea or requirement for digital transformation? please write to us at siva@vsonlineservices.com